I’m in the world’s worst VHF location. At 43ft above sea level in the ‘Nene Valley’ of the Northants/Cambs border, we’re well challenged when it comes to VHF. UHF is a non- starter.
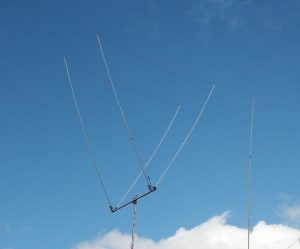
There’s plenty of designs around for 2m antennas, but here we’ve took a slightly different approach. I plan to use the antenna in the vertical plane so it can be used for local and/or semi local contacts in the FM and repeater section of the band.
I already have an 8 element OWA [12.5dbi] that performs pretty well but it hasn’t quite got the legs to achieve the longer distance contacts. So, with some spare hardware in the workshop, I set about designing something with a little more clout.

For a base design, I selected a 13 Element OWL [Optimised Wideband Low Impedance] antenna as a starting point on a boom length of just over 8m, with 16.27dbi forward free space gain and about 25db front-to-back ratio. It was originally designed as a 144MHz array. Unlike the OWA [Optimised Wideband Antenna], the OWL is a natural low impedance design. Low impedance designs typically have more gain than their 50-ohm counterparts. However, with a natural impedance of only 12.5 ohms, the builder will need to construct some form of matching arrangement to match the 50 ohms of the radio.

Read down further for more details on how to construct the match
Those familiar with Q82.uk will know that in the past I’ve successfully used the DK7ZB coaxial matches that will convert common low impedances up to 50ohms. The popular ones are 12.5, 18 and 28 ohms.
DK7ZB’s info shows that 2 parallel lengths of 50-ohm coaxial cable wired as show here, will give a good match. I’ve done this in the past with a 10 element OWL with great success. Low SWR across a wide bandwidth.
So, following the same formula, I cut 2 lengths of Westflex 103 high grade low loss coax and using my MFJ259B antenna analyser, trimmed each one to the correct length. What the builder must understand is that each length should be cut to a quarter wavelength at the required frequency and then trimmed taking the coax velocity factor into account. The match should be constructed using the same type of coax. Don’t mix up different varieties.

Originally, my Westflex coax pieces were 49 cms in length but I ended up trimming them to 33.5cms which seemed wrong as the published velocity factor of this coax is 0.81. With a length of 33.5cms, the [Actual] V/F was nearer to 0.70 showing that coax specs don’t always mean much. I put this down to the coax was about 20 years old [although never used]. Over time, the V/F looks to have changed so it’s always worth checking with an analyser first.
When using your antenna analyser, you should measure each coax length and have the ‘far end’ open circuit which is typical when measuring quarter-wave stubs. Trim the coax until the ‘X’ [reactance] is as close to ‘Zero’ as possible at the frequency of operation.
I found these stubs were extremely wide banded with the ‘X’ showing ‘Zero’ from around 139 to about 151Mhz. I allowed an extra centimeter [34.5cms in total prior to soldering] just so a small allowance was made during the trimming process. The result was 33.5cms fully soldered up.
In addition, I added a stub wire, sometimes referred to as a ‘Pawsey Stub‘. The Pawsey Stub helps create a clean transition between balanced antennas and unbalanced coaxial cables. This symmetrical configuration also creates a high impedance at the shorted end which effectively acts as a choke, suppressing unwanted currents on the outer conductor of the feed line. For good measure, I’ve added 3 x Type 61 clip-on ferrites which should supress any remaining common-mode currents should there be any.

During evaluation, builders can normally spot if there are any common mode currents affecting the feedline, as moving or touching the feedline will cause serious SWR swings. Our own setup saw no SWR [or very little] during testing indicating the system was working as intended.
As I wanted to keep the array as lightweight as possible, I used 30mm x 2mm box section aluminium for the centre boom section and 25mm x 2mm box for the outers which telescope in nicely. It’s not a heavy-duty antenna as such, but should withstand reasonable punishment. Purists may want to include a support arrangement to prevent boom sag at each end which was present to some degree.
I’ve changed the design to use 7.93mm [5/16ths] solid aluminium rods which are freely available here in the UK and fairly cheap. Single ‘Stauff’ [or equivalent] pipe or hydraulic clamps are used mounted above the boom. The Stauff reference is 108aPP – these being Group 1a, 8mm Polypropylene clamp halves. Don’t use the black ‘PA’ [Polyamide] version of the clamps as these contain carbon and can change the electrical characteristics of the antenna which at VHF, can be quite problematic.

Click on the image for a hi-res PDF [Opens in a new tab]
The driven element is designed differently in that I’ve used 16mm tubing for the inner sections with 12mm centre inserts and then 8mm outer rods to allow for tuning. The Stauff clamps here are 216PP – Group 2, 16mm Polypropylene. The element is mounted on a small section of spare engineering plastic which is then drilled directly through the boom.
The EZ-NEC file is available to download at the bottom of this page, but for reference, the driven element shows 8mm tubes in the model. I didn’t change it as having 8mm outer rods that were adjustable would mean the array was fully tuneable. However, if you use the 16, 12.7 and 7.93mm sections as shown below, you should hit the sweet spot without too much adjustment.

So, here’s the rundown on the mechanical data. For reference, I’ve re-modelled the array to be primarily focused around the 145 to 146Mhz area which [in the UK] are frequencies used for FM and repeater work. Saying that, in the real-world build, the SWR was around 1.4:1 around 144.000MHz, lowering to 1.2:1 at 144.500MHz and flat 1.0:1 between 144 and 146MHz.
| Element Name | Element Full Length (mm) | Element Boom Position (m) |
| Reflector | 1014 | 0 |
| Driven Element – *Tune 8mm end-tips | *976 (488mm per half ele) | 0.18 |
| Director D1 | 938 | 0.445 |
| Director D2 | 920 | 0.75 |
| Director D3 | 908 | 1.285 |
| Director D4 | 897 | 1.99 |
| Director D5 | 884 | 2.78 |
| Director D6 | 873 | 3.62 |
| Director D7 | 862 | 4.495 |
| Director D8 | 850 | 5.39 |
| Director D9 | 836 | 6.31 |
| Director D10 | 820 | 7.22 |
| Director D11 | 832 (correct- it’s longer) | 8.095 |
In real world testing, we found the SWR to be excellent across the whole band.


Stay with us over the coming months when we install the array and compare it to the older 8 element OWA. Does this long boomer do the job and is it worth the upgrade?
Experimenters: Feel free to download the EZ-NEC file here