Symetrix 528E Audio Processor Overhaul
In this article, I plan to do an overhaul of my trusty Symetrix 528E Audio Processor.

The Original Symetrix 528 was released in the late 1980’s and updated to the newer 528E model in 1995. The evolution of the 528E progressed over a 7 year period with 8 revisions in total. My own unit is circa 1997 and is the ‘B.00’ revision, although subsequent revisions followed afterwards and continued until 2002 which had the final ‘D02’ revision.
The 528E is an analogue channel strip which performs six different functions. These being microphone preamplification, de-essing [sibilance removal], compression/limiting, downward expansion, parametric EQ and voice symmetry alignment. It’s a particular favourite with the amateur radio community, proving itself as a premium channel strip with plenty of functionality giving the operator many additional controls over their transmitted audio.

As a second-hand buy today, they are freely available on places such as eBay for around the $200-$250 mark, but be prepared to strip out all the CAPS and do the overhaul shown here.
Most units are unlikely to have been upgraded and are pretty well guaranteed to have their fair share of bad electrolytics. They may well be advertised as ‘Good Condition’ – but inside won’t be the same scenario although you may be ok with a later 2006 or 2007 year unit. The overhaul requires quite a lot of patience, a day of your time and a bit of de-soldering luck!
In its natural environment, it was popular in broadcast studios being used at the heart of many ‘Voice Overs’ as a one channel console that would do a lot of stuff from just one box.
With this unit, early examples are now not shy of 25-30 years of age, I found my own ‘1997’ B.01 becoming rather noisy in some areas especially on transmit and on close internal inspection, it seems all components on the main board are factory original.
As most will know, electrolytic capacitors deteriorate over time and some are almost guaranteed to be bad. So, it’s now time to remove all of the electrolytic CAPs both in the audio chain and also from the power supply side.
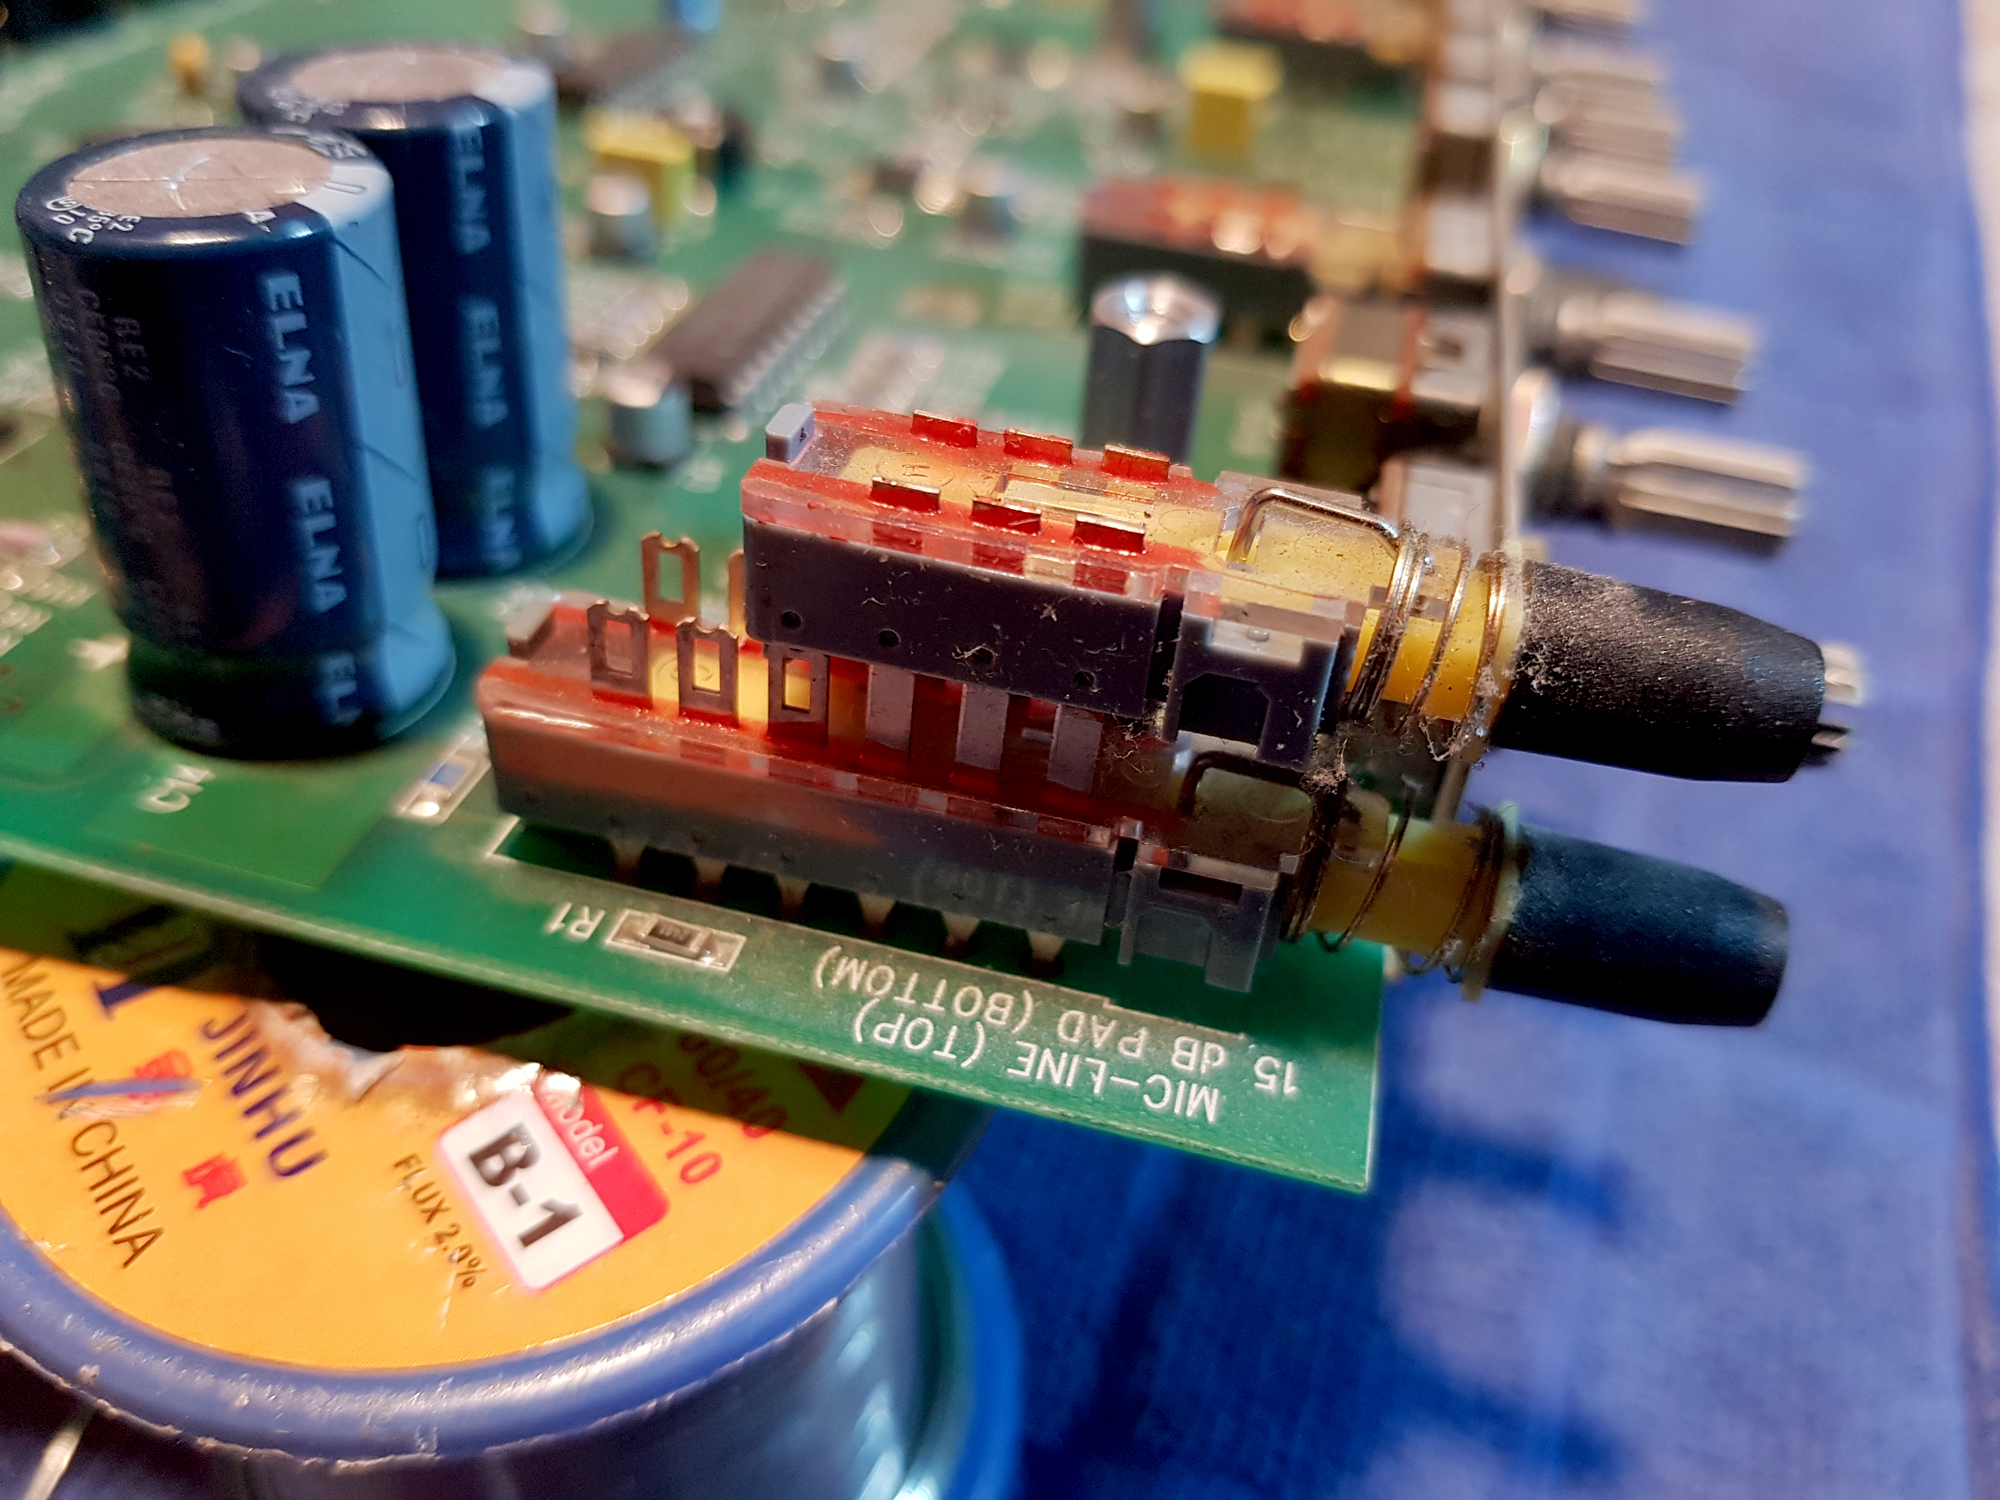
Additionally, some of the switches are very noisy in their function so I’ll be replacing some of them with higher quality ‘CK Switches’ at the same time. There is also a hybrid switch on the mic pre-amp side which consists of a DPDT plunger switch [F2UEE] which piggybacks a 6PDT [F4UEE] so I plan to replace those as a matter of course.
On the left-hand side of the front panel, there’s also a very noisy 2K5 potentiometer which is the main mic pre-amp gain control, so that will be removed and replaced with a Vishay 1w version.
The electrolytics on the audio side are bipolar SMD’s and with this overhaul, I’m looking at replacing them with higher quality non-SMD devices [Nichicon ‘KZ’ and ‘ES’ MUSE premium grade audio CAPS]. The spec of these will be far better than the factory originals. The total cost of the overhaul is estimated at about £50.00 in parts.
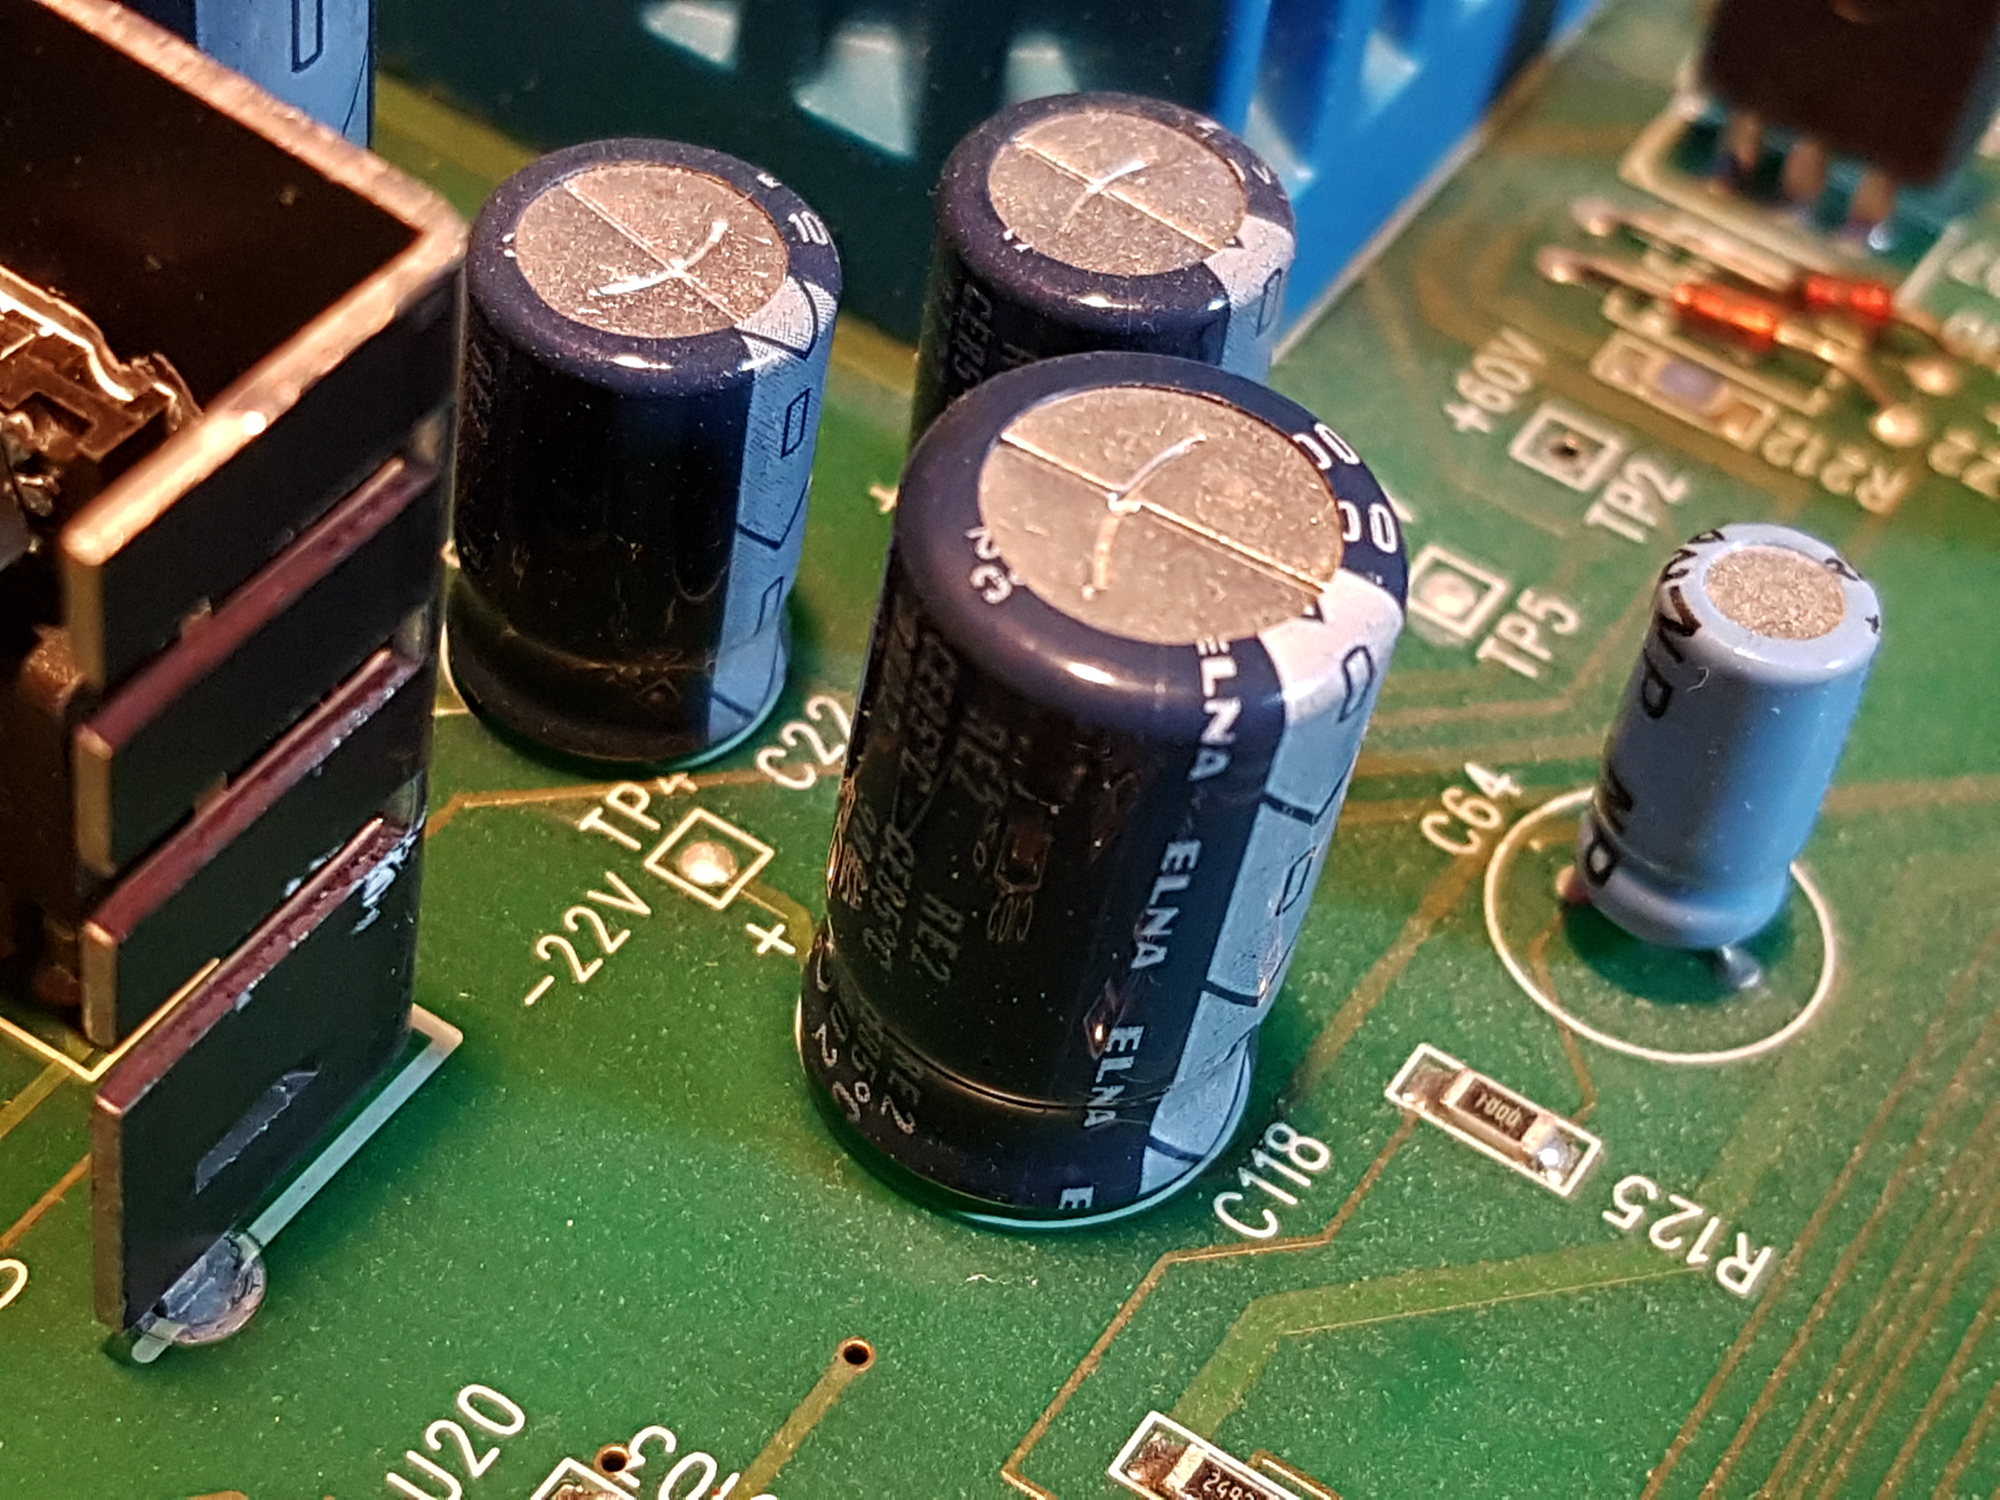
On the power supply side, the current offerings are from ‘Elna’ which has a good name.
These will be replaced by ‘Nichicon Muse’ ,‘Vishay’ and other premium upgrades.
New Components:
4.7uf Bipolar Nichicon Muse Electrolytic Capacitors [Audio Circuit] – Mouser
47uf Bipolar Nichicon Muse Electrolytic Capacitors [Audio Circuit] – Mouser
F2UEE ‘F-Series’ Pushbutton Switch [CK Switches] DPDT – Mouser
F4UEE ‘F-Series’ Pushbutton Switch [CK Switches] 6PDT – Mouser
Power Supply Polarised Electrolytic Capacitors [various] – Mouser
Or visit the Hi-Fi Collective [UK based] for some premium Panasonic FM Electrolytics
Potentiometer: Pre-amp Mic Gain [2K5] – R24 – CPC Farnell
Tip: When replacing capacitors [or any component for that matter] we’d suggest purchasing from a reliable source such as Farnell/RS/Mouser/Digi-Key and the like.
Avoiding eBay/Ali Baba etc should mean you won’t be buying any fake Chinese junk.
On the SMD CAPS, I plan to remove them using a hot-air station.
There will be more to follow on these as we’ll check each of the CAPs for their ESR performance.
Check back with us soon where we’ll have more to report.
REPORT UPDATE 1 – February 2023
OK, so I found a spare day to begin work in the 528E, however my ambitions were dashed somewhat as became very apparent that this is a really difficult PCB to work on. Disassembly was fairly straightforward in taking off the cover and front panel – and then unscrewing various chassis screws and the daughter board to reveal the main PCB.

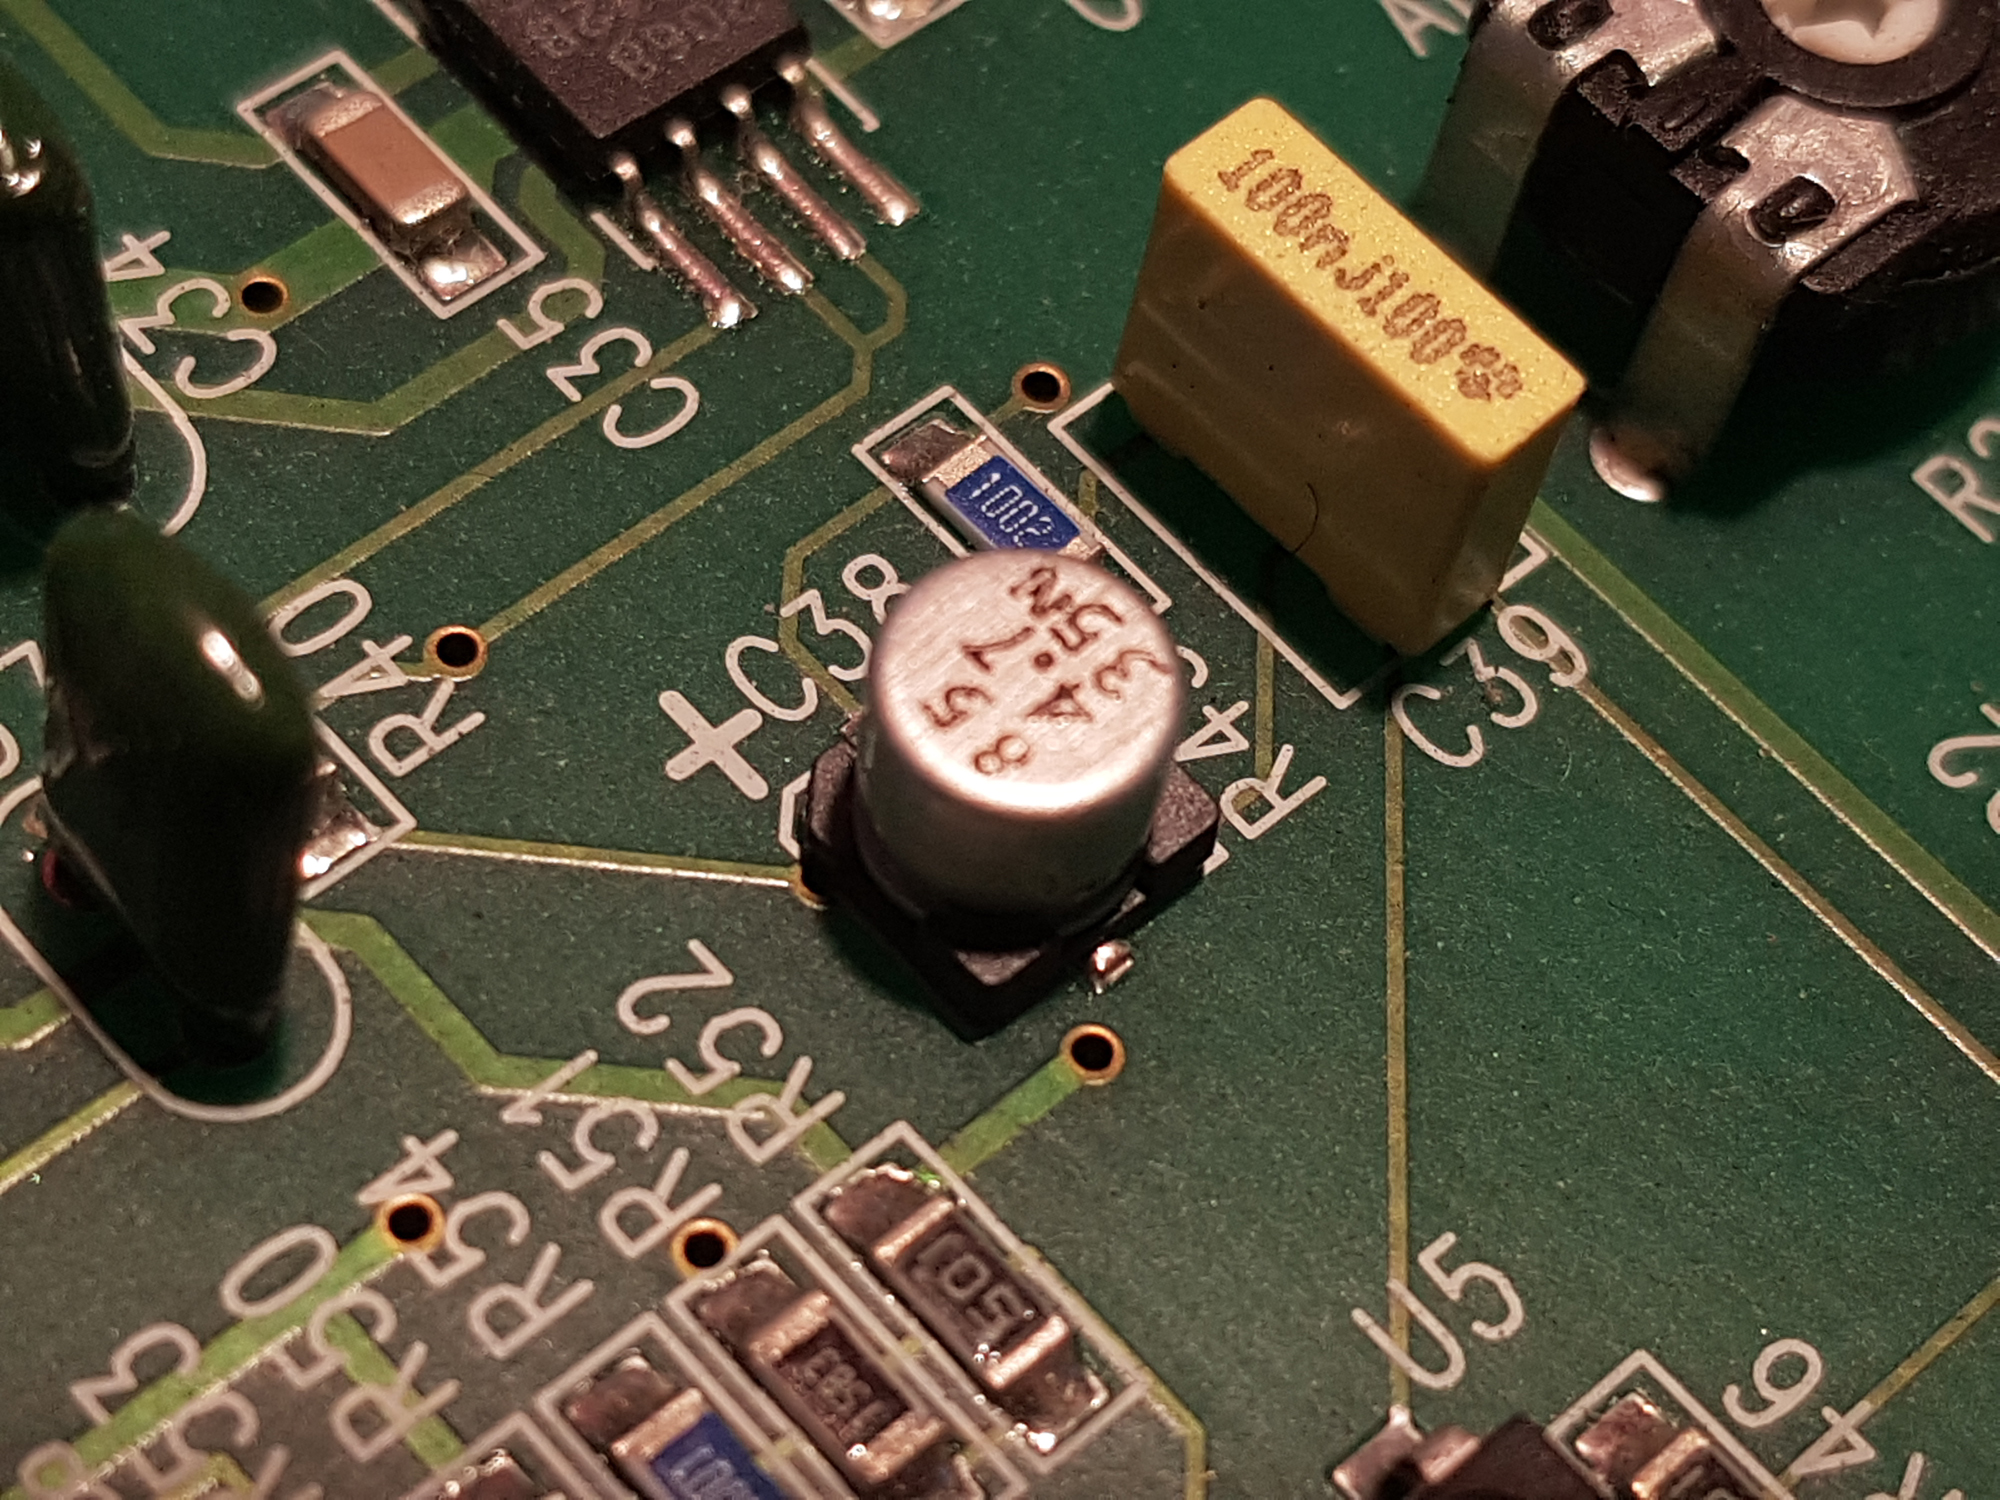
So – to work. Firstly I removed all of the 14 x bipolar 4.7uf electrolytic caps on the audio side which are all SMD devices. The hot air rework station made this an easy task. Checking the caps, all were out of spec and some had very high ESR [Equivalent Series Resistance] figures and two were totally shot.
Rather than replace like-for-like, I purchased some much higher quality Nichicon ‘MUSE’ non-polarised electrolytics – which are designed specifically for audio applications. As they are not SMD’s, but ‘Radials’, they stick out a little from the PCB but I’m after quality here rather than aesthetics. In the same process, I replaced 2 x 10uf SMD’s again with Nichicons.
When this job was completed, I also replaced a few other electrolytic caps taking a ‘belt and braces‘ approach. As it was, they were all ok but out of spec by about 25% so it was worth doing.
Now onto the power supply. The PSU has 4 large 1000uf electrolytic caps and some 470uf/47uf radials scattered around. The originals are ELNA which is a premium Japanese brand. Saying that, I’ve seen YouTube videos where engineers have [as a matter of course] replaced these in other 528E’s and were right to do so.
I have a fairly comprehensive soldering and de-soldering station with a nice Hako professional iron/SMD soldering and de-soldering station and gun. Even so, this part of the board gave me some trouble. Even with the de-soldering gun, I managed to mess up a couple of the vias and destroyed some of the tracks in the process on the power supply side – so a fiddly repair job was needed.
You can get a bit disheartened as you want the board to look the best it can after you’ve finished working on it, but I put that to one side and thought as long as it works [and well] – then it doesn’t have to be super ‘pretty’ inside.
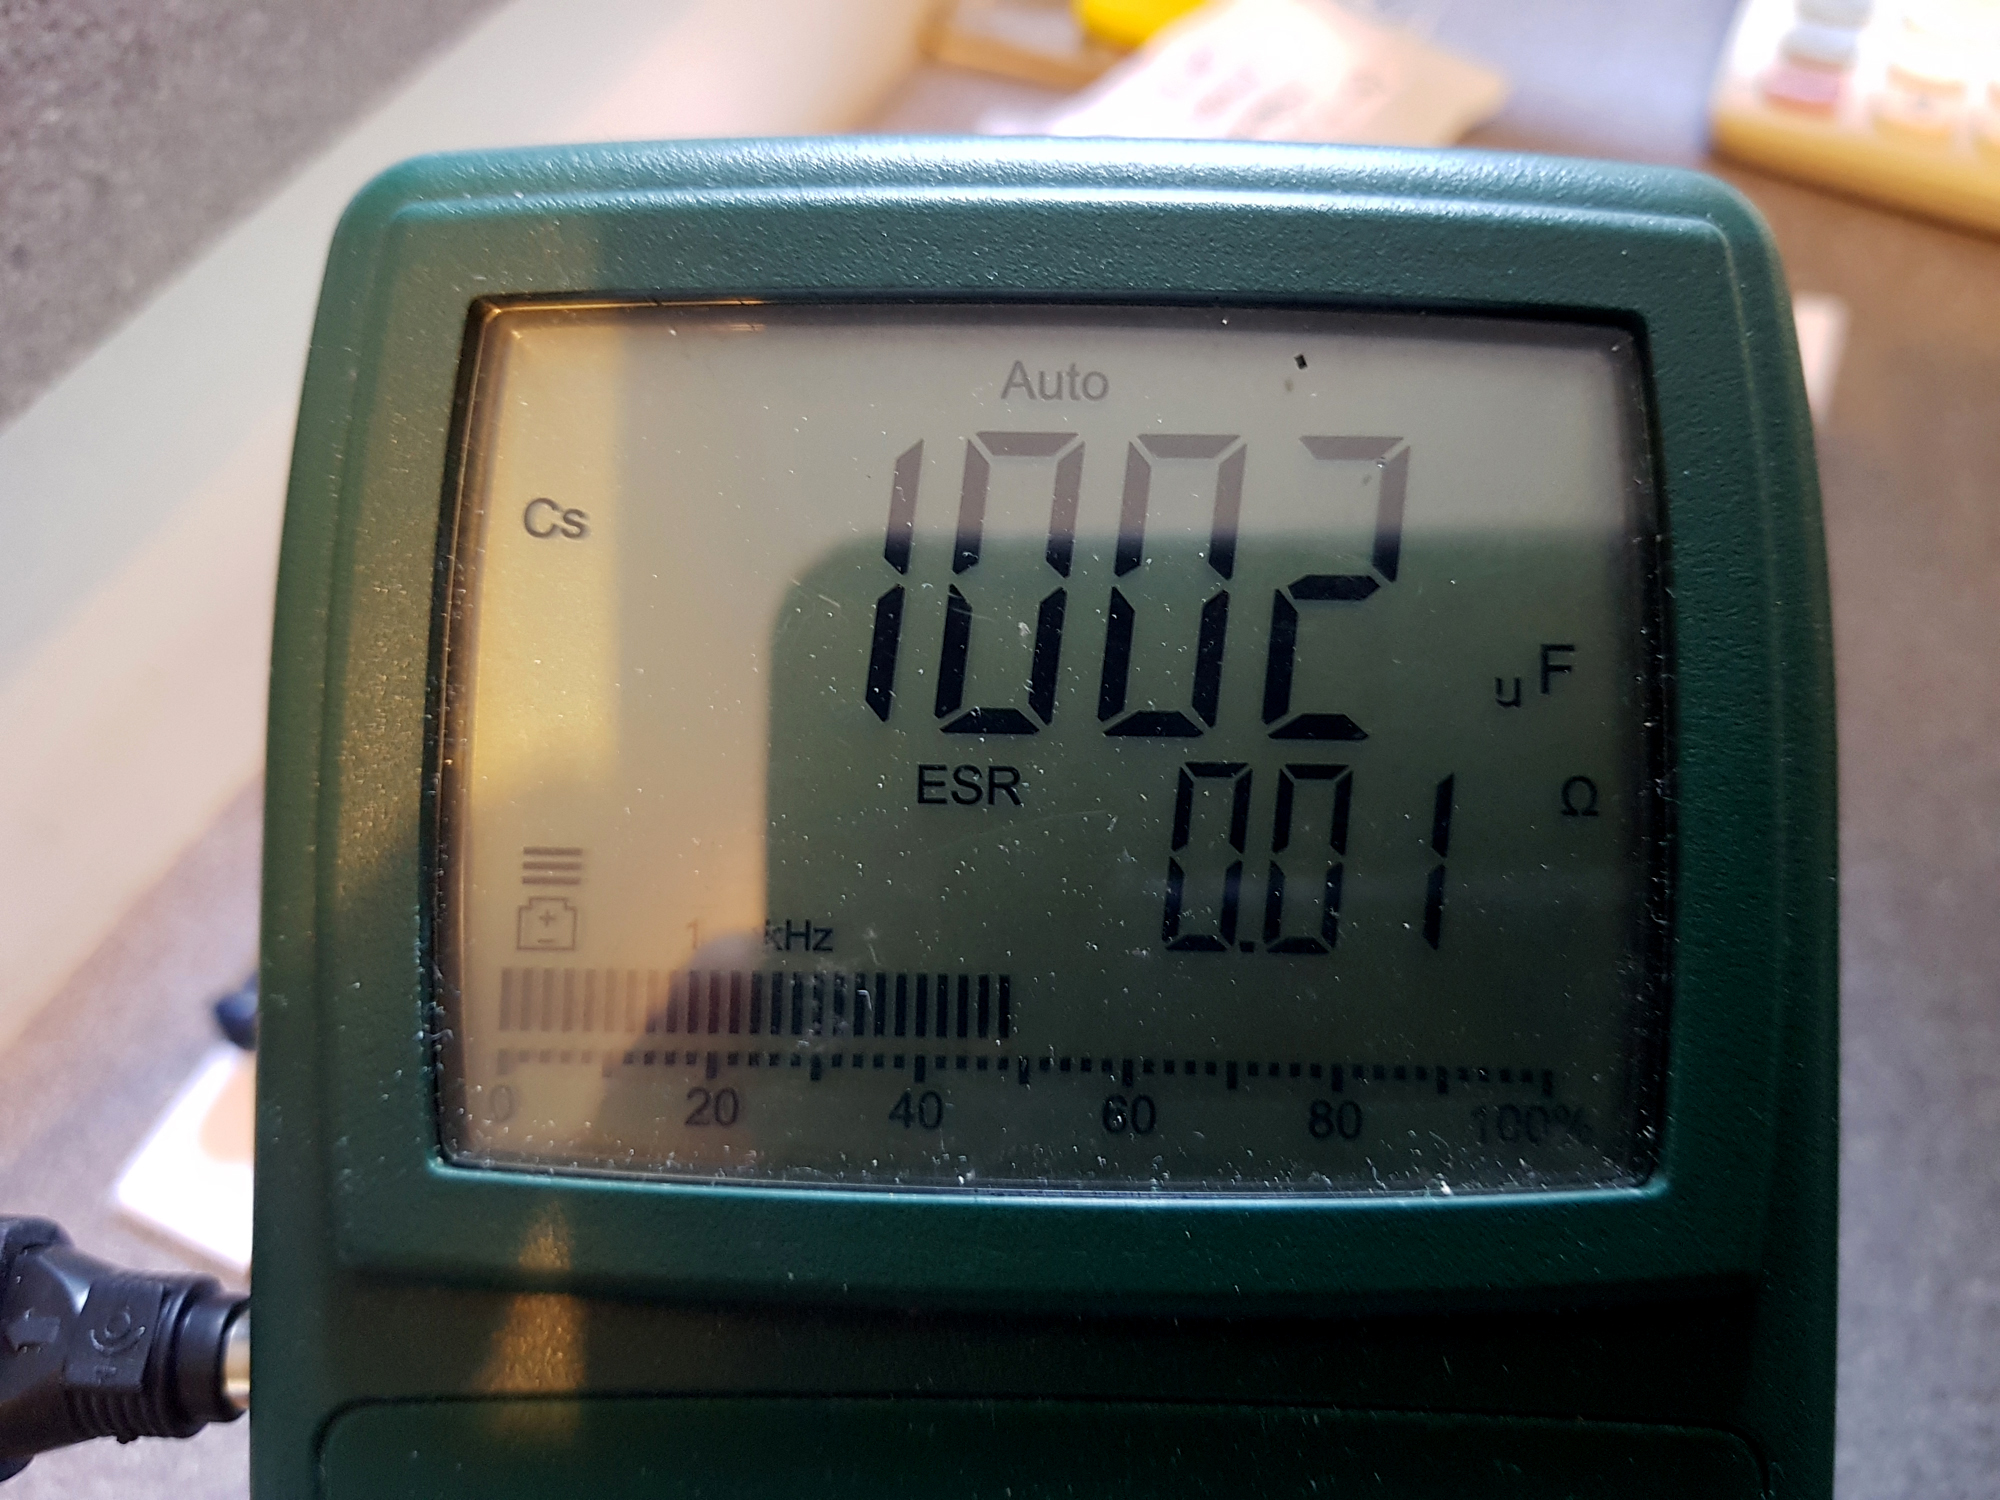
On removal, I found that 2 of the 1000uf caps [main filtering] measured around 560uf [way out of spec] and had a very high ESR readings. The other two had a reasonable ESR reading but again were out of spec at around 780uf instead of the 1000uf – so outside of the 20% tolerance. These were replaced by premium Vishay 146RTI electrolytics which are specially designed for power supplies and have a very low ESR.
So with the caps all done and a handful of new traces and a bit of a repair job, I thought before anything else – I’ll do a quick re-assembly and see if the unit still worked which is always a bonus 🙂
Well it did first time and it was a real success. The slight scratchy noise on the transmit audio has totally disappeared so the re-cap job was certainly worth it. Audio output was so much smoother than before and the re-cap injected a new lease of life into the ‘old-girl’. On reflection, I think the PSU would have expired in the not too distant future had I not intervened now.
REPORT UPDATE 2 – March 2023
I’ve yet to replace the switches but have the new ones still in the workshop. I was somewhat in two minds as to whether to go ahead as the switches although noisy on operation, actually worked. I had the thought of possibly having another unsoldering nightmare and maybe a unit that ended up being trashed, so they are tucked away in storage until I absolutely [really] need to install them.
The same goes for the slightly noisy 2.5k potentiometer. I’ll live with that for the time being as once set, you don’t really need to keep adjusting the 528E – it’s a ‘set and forget‘ unit for sure.
Well, that’s it for now on the 528E – if I need to revisit the unit at anytime in the future, the updates will be included here.